

How To Add Blog To Joomla Website
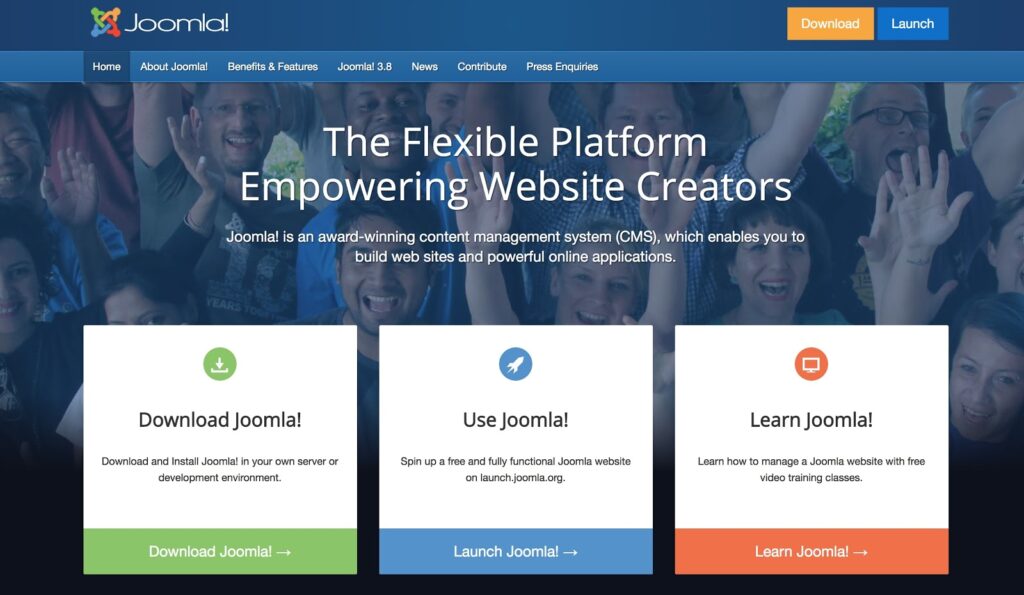
Joomla! is the second most popular Content Management System (CMS) on the planet, only surpassed by WordPress. It's currently used by over 3 percent of all sites on the internet and has amassed an impressive community of creators and developers. However, what does this mean for you?
By using Joomla!, you can create phenomenal websites with little-to-no programming knowledge. It's a slightly more advanced solution than some of its competitors, but it still retains a user-friendly interface. What's more, it's a free and open-source platform.
In this article, we'll dig deep into Joomla! and its history. We'll discuss the platform's pros and cons and talk about when you should consider it as the foundation for your website. Finally, we'll show you how you can use Joomla! to create a new site. Let's get started!
An Introduction to Joomla!
 When it comes to CMSs, WordPress tends to get all the attention. This isn't necessarily surprising, considering that it's the most popular platform of its kind. But that doesn't make it the only viable option.
Joomla! is the internet's second most popular CMS. It's worth noting that the exclamation mark is actually part of the platform's name, which itself is an anglicized version of the Swahili word "jumla." This roughly means "whole" or "all together," which represents the platform's purpose as an open-source resource.
Since its launch in 2005, Joomla! has now grown to the point where over 3 percent of all websites use it. It's also become a popular alternative for creating sites, due to its combination of advanced configuration options and a user-friendly interface.
All in all, Joomla! is an incredibly versatile and scalable platform that enables you to create more complex sites than many other CMS solutions. You can see this demonstrated in the range of websites that use Joomla!, such as Linux.com, the Guggenheim Museum website, and even Harvard University.
How Joomla! Works
As we've mentioned, Joomla! is a CMS. For the uninitiated, this is a type of application that can be used by multiple people to create, store, manage, and publish digital content. The most common use for any CMS is to create websites.
In contrast to WordPress, which was initially developed as a blog-centric platform, Joomla! was created from the start as a versatile CMS that could be used for almost any type of website. When it comes to the actual creation and maintenance of your site, Joomla! is in many ways similar to WordPress and other popular CMS options. It enables you to publish articles, expand your site's functionality with extensions, and change its appearance via templates.
To use Joomla!, you can simply download it for free and install it on your website. However, you can also use the free Joomla! Launch service to create a website using the platform, without the need to have your own hosting.
We're going to discuss the ins-and-outs of getting started with Joomla! in more detail later. First, however, let's discuss why you might want to choose Joomla! in the first place.
Using Joomla! for Your Website?
Did you know that DreamHost users can install Joomla! with just one click? We make using your favorite CMS easy. Plans start at $2.59/mo.

When and Why You Should Use Joomla! to Create Your Website
Which platform and tools you use to create your website will ultimately depend on what type of site you intend to build, as well as your personal skills and preferences. As such, let's look at the main advantages of Joomla!, to help you decide if it's the right platform for you.
The first and arguably greatest advantage is Joomla!'s scalability and flexibility. Joomla! is also somewhat more technically complex than WordPress, offering more advanced configuration options. This means that Joomla! lends itself better to creating ambitious projects. After all, there's a reason many university and business sites choose Joomla!.
Very experienced users can also take advantage of the Joomla! Framework, which lets you use the platform in even more intricate ways. For example, by using this framework you can create complex business directories, reservation systems, data reporting tools, and inventory control systems.

Despite its advanced features, Joomla! remains a user-friendly platform, which is still easy to use even if you have little-to-no experience in coding or website design. However, for a complete beginner, it will have a somewhat steeper learning curve than WordPress. Fortunately, the very active Joomla! community is always on hand to help out with documentation and direct support.
If you're curious about Joomla! or still not sure whether it's the right option for you, we recommend that you use the Joomla! Launch service mentioned above to create a free website. This will give you a chance to test out the platform, without making a firm commitment.
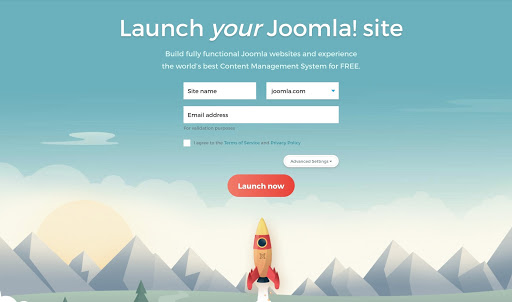
If you decide you like the way Joomla! works, you can then keep your Launch site or install the software on a self-hosted website.
Want More Joomla! How-To Guides?
Join our monthly newsletter for tips and tricks to build your dream website!

How to Get Started With Joomla! (In 4 Steps)
By now, you should have a solid idea about whether or not Joomla! is the best option for you and your website. Now, let's look at the practical aspects of the platform.
In the following guide, we'll show you how to set up your site, begin creating content, and expand it with extensions and templates. Let's get started!
Step 1: Install Joomla!
Before you can do anything else, you'll need to install Joomla! on your website. There are a few different ways you can go about this.
As we've mentioned, you can use Joomla! Launch to create a free site in minutes. However, this comes with a number of limitations. For instance, you'll have to manually renew the site every 30 days to keep it online. As such, we don't recommend that you use this service for a permanent website.
Instead, you can host your own website using one of two methods. The more advanced option is to perform a manual installation. This involves downloading Joomla! for free and installing it on your web host's server.
The general steps for doing this include:
- Creating an SQL database for your site.
- Uploading the Joomla! files to your site's root directory.
- Running the Joomla! configuration wizard, which you can reach by accessing your site's URL.
- Configuring your database.
- Installing the included sample data and configuring your email.
This process is ideal for developers who want to be involved in each stage of the installation process. However, it can be a little too convoluted if you just want to get a website online. Fortunately, there's a much easier way to do that – namely, using a one-click install option.
Some web hosts offer one-click installs for the most popular CMS platforms. For example, here at DreamHost we let you install many popular applications this way, and Joomla! is no exception. Therefore, let's look at how to use the DreamHost one-click install option to get started with Joomla! quickly.
First, you will need to log in to your DreamHost control panel.
Then, navigate toDomains > One-Click Installs in the left-hand menu. This opens a page where you can see all the available one-click options.
 Click on the Joomla! option, which will open a window with more information about the application.
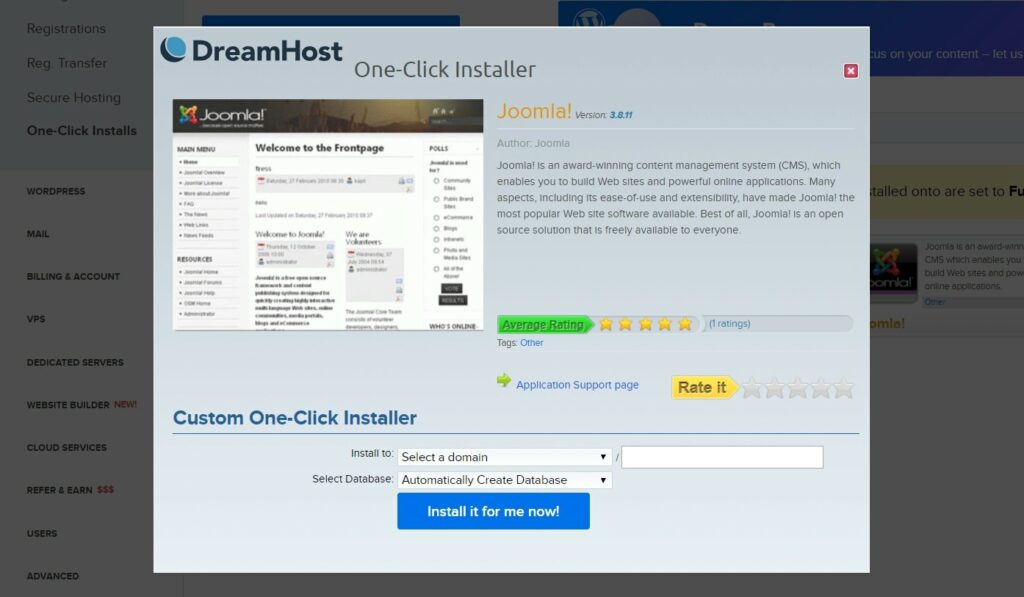 At the bottom of this window, you'll find a few fields where you can configure your new site.

Here, you can choose which of your existing domains you'd like to use, specify a subdirectory, and select a database to use. You can either pick an existing database or create a new one for this site.
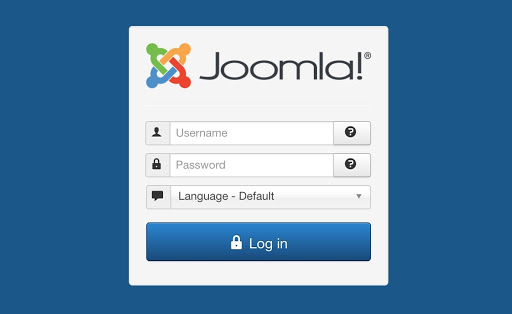
When you've made your choices, click on Install it for me now! to create your new website. The application will be installed within a few minutes, after which you'll receive an email with information about how to log in to your new site. You can then complete the configuration wizard that we mentioned earlier.
Step 2: Start Creating Content
Once you've completed the installation process, you'll be able to access your Joomla! website. First, you'll be asked to log in with your admin credentials.
You'll then be taken to your new site's control panel.
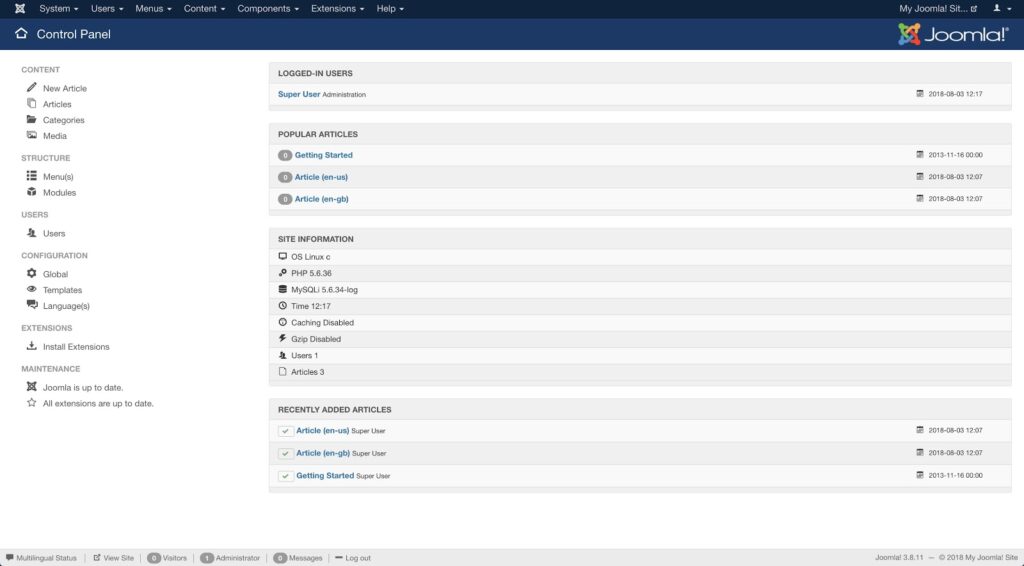 As you can tell, there are a lot of options in this control panel. We're just covering the basics in this guide. If you'd like to know more about what you can do in this interface, we recommend that you refer to the official documentation.
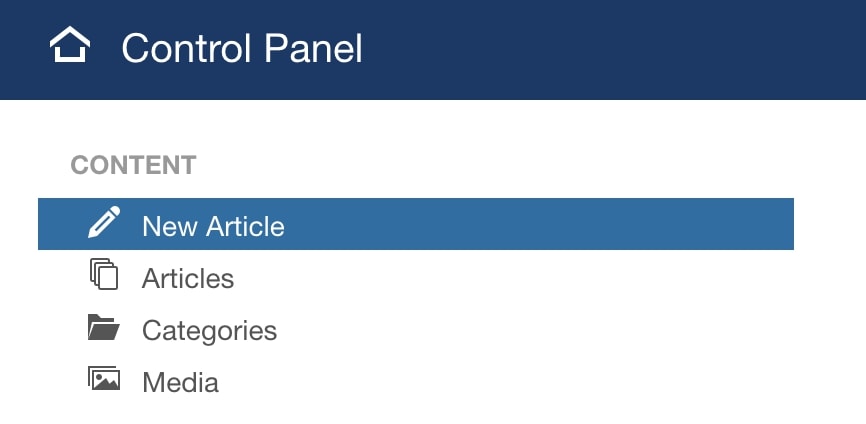
For now, let's focus on the most crucial tasks, starting with creating new content. If you're familiar with WordPress or any other CMS, this process should offer few surprises. For the purposes of this example, let's create a new post, which in Joomla! is called an 'article.'
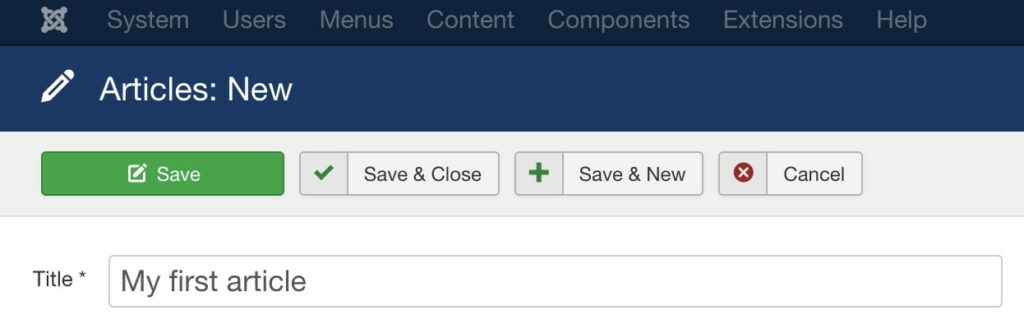
To get started, click on New Article in the Content menu on the left-hand side of the screen.
This will take you to Joomla!'s TinyMCE-based HTML editor, which you can use to write articles.
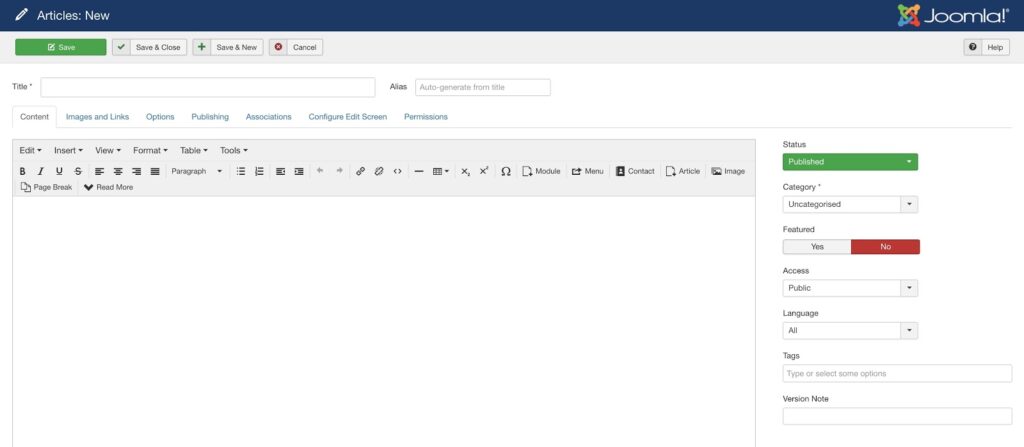
You can write your content in the main window, using the options menu right above it to format the text or add new elements. Above that, you'll see a row of links. These will take you to additional options for the article. For example, you can use the Images and Links tab to set a main image for the article, as well as to add in links.
We recommend that you explore the different tabs here and refer to the Joomla! documentation for assistance if needed. There are a lot of options but most are very self-explanatory. After just a few articles, you'll likely find the editor quite intuitive to use.
When you've finished creating your first article, you can save and publish it. To do that, return to the Content tab and take a look at the options on the right.
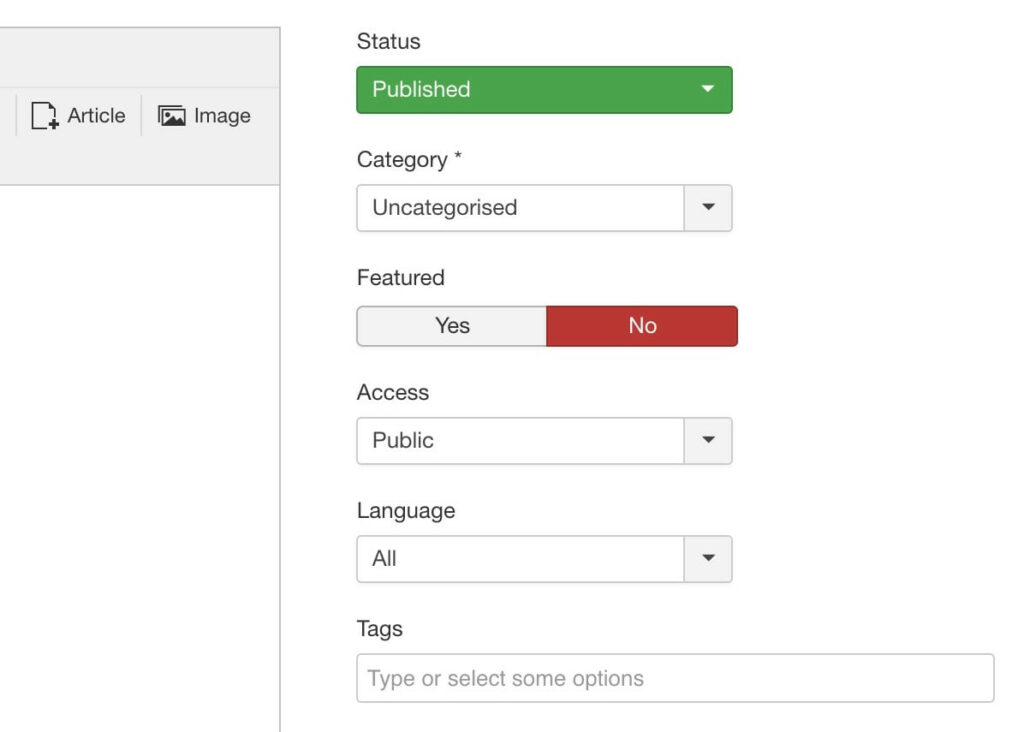
Here you can assign the article to a category and give it tags, decide if it should be a featured item, and determine its visibility. When you've done that, click on one of the Save buttons, which are located in the top-left corner.
Once the article has been saved, you can check it out on your site.
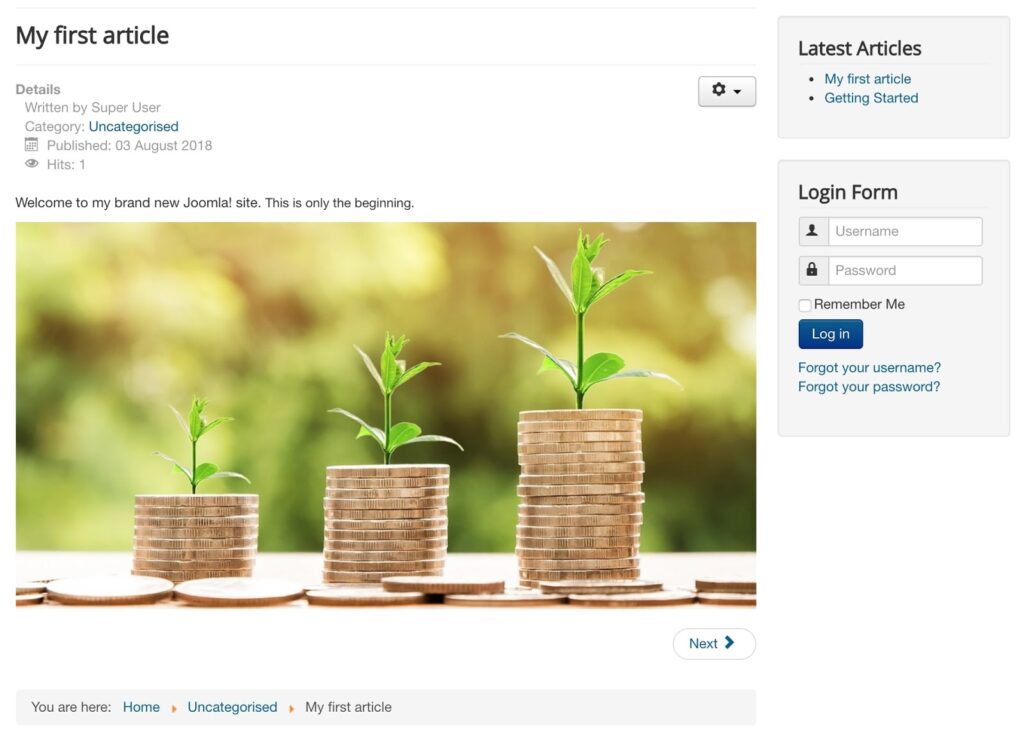 This is looking pretty good already. Of course, there's a lot more you can accomplish when you're more comfortable with the editor. For now, however, let's turn our attention towards adding new features to your site.
Step 3: Add Extensions to Expand Your Site's Functionality
Joomla! extensions work in much the same way as WordPress' plugins do. In essence, they are collections of code that you can install on your site, which implement additional features. This option lets even a beginner or a non-coder create sites with advanced functionality.
There are thousands of extensions available for Joomla!, both free and premium. You can find many of them in the official Extensions Directory.
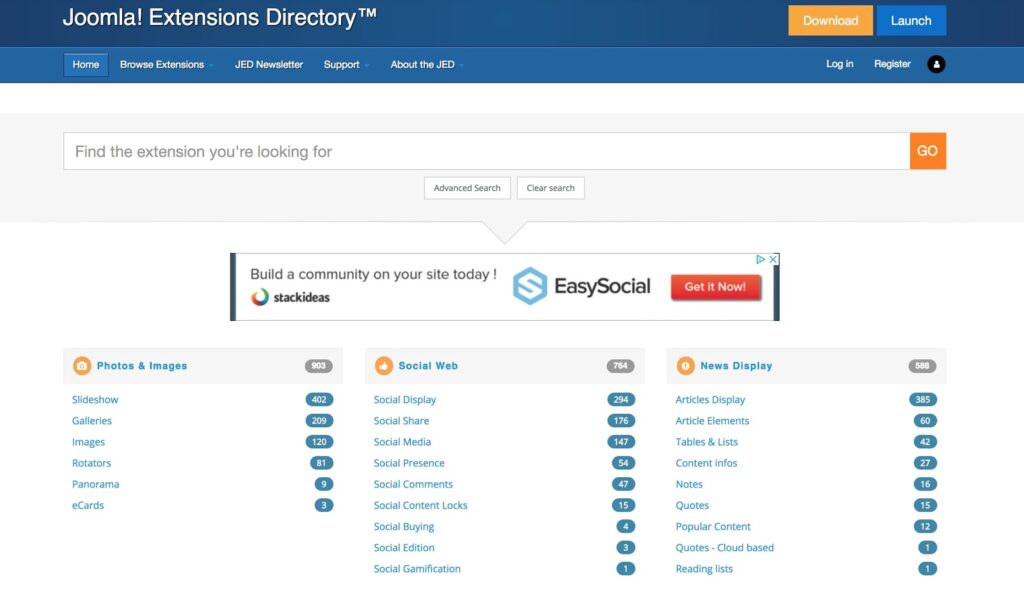
Here, you can browse for extensions based on their category and purpose.
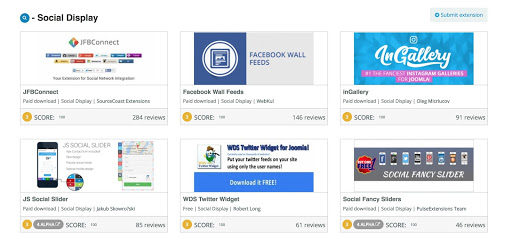
When you find an extension you want to use, click on it to open its main page.
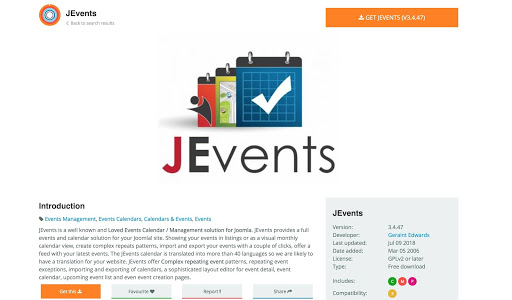
This will show you more information about the extension and provide links that you can use to download it.
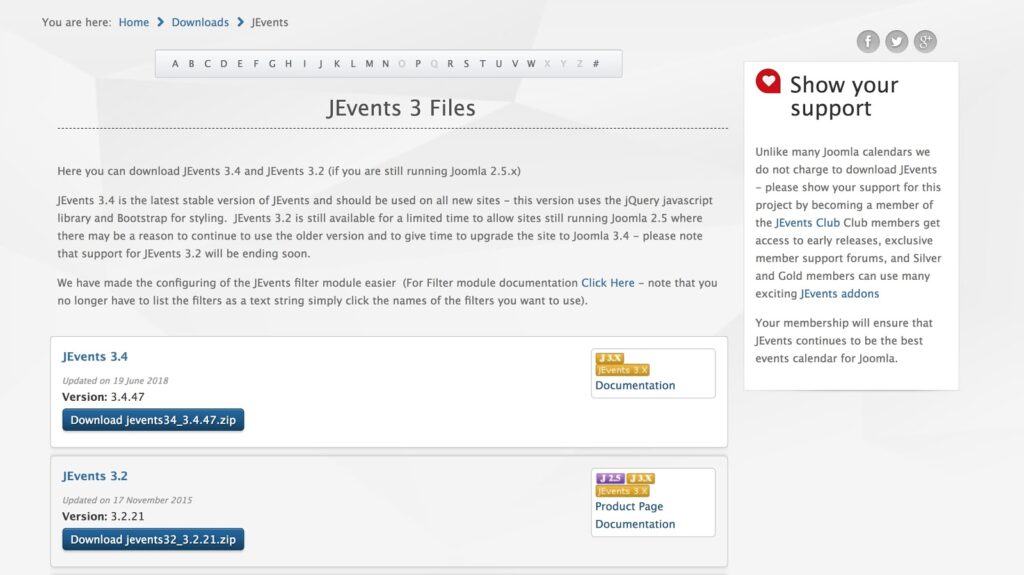
Once you have the extension file saved to your computer, it's time to install it on your site. To do that, you'll need to return to your site's control panel, and access the Install Extensions option in the main menu.
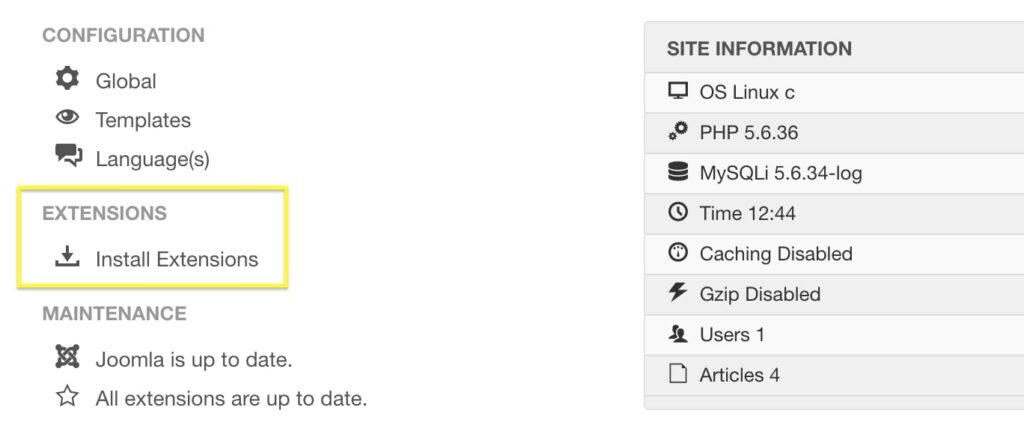
This takes you to your Extensions page, where you can add and manage extensions.

Installing a new extension is as simple as dragging-and-dropping its ZIP file onto this page. Alternatively, you can select the Or browse for file button to find it on your computer. Either way, the extension will be uploaded and installed on your site.
Once the process has been completed, you'll see a success message along with some information about the new addition.
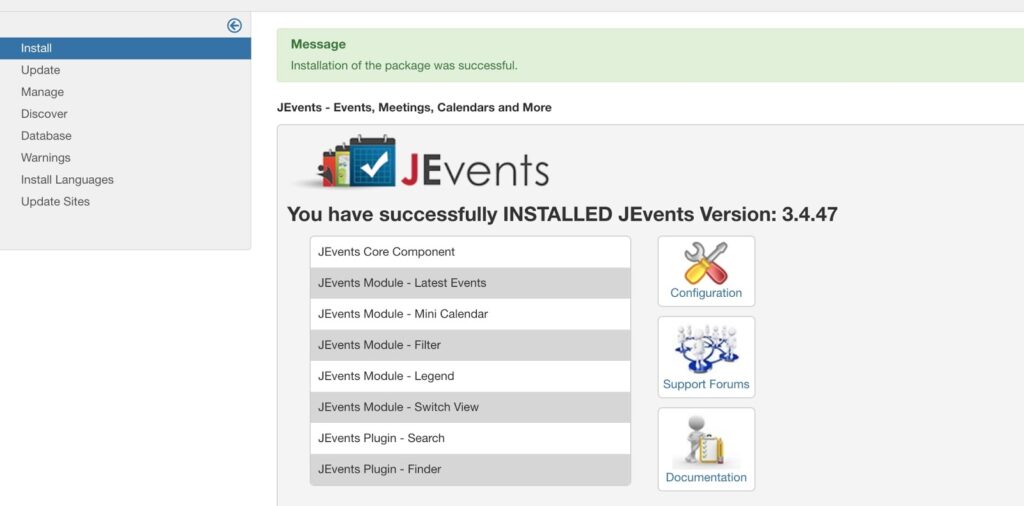
At this point, your extension is ready to go! You can now configure it or simply start using it, depending on the extension in question.
Step 4: Change Your Site's Appearance With a Template
We all know it's what's on the inside that counts. However, that's not to say your site's look isn't important too. You probably won't want to stick with your new site's generic standard design, after all. So let's look at how to change things up using Joomla! templates.
These function just like WordPress themes, in that they change the appearance and layout of your site. As with extensions, there are plenty of free and paid options you can add to your site. You can find a lot of choices on sites like ThemeForest and RocketThemes.
To switch your site's current template, you'll need to find and download a new one from an external site. If you're feeling up to the challenge, you can even create one yourself. When you have the ZIP file in hand, you'll once again want to access the Extensions screen, just like you did in the previous section.
You can install a new template exactly like an extension. As such, drag your template's ZIP file onto this screen or search for it on your computer. Once it's installed, you'll see a message letting you know that it's been added successfully.
To actually use the new template, you'll need to assign it to your site. It's worth noting that Joomla! lets you do quite a lot of advanced things with templates. For instance, you can use more than one template on a site, which is something you can't do in WordPress.
However, for now, let's stick to the basics. You'll want to add your new template and assign it, so start by clicking on Templates in your control panel menu.
This will open the Template Manager, where you can see all currently-installed templates.

To set a template as your default, you only need to select the button marked with a star next to its name.
Once you've done that, you can view your site and see the new template in action. With that, you've successfully learned the basics needed to manage your Joomla! Website.
Extension Connection
When it comes to CMS platforms, Joomla! manages to be both user-friendly even to beginners, and still offer a powerful website management system. This is a platform that's relatively easy to get started with, and it offers plenty of options to expand and scale your site. There's also a stellar community that can assist you along the way.
Do you have any questions about using Joomla! to create a website? Join the conversation today!
How To Add Blog To Joomla Website
Source: https://www.dreamhost.com/blog/beginners-guide-to-joomla/
Posted by: moorenetaid.blogspot.com
0 Response to "How To Add Blog To Joomla Website"
Post a Comment