Display Facebook Events On Website
Are you looking for easy ways to display a Facebook events calendar on your website?
Showing your Facebook page's events calendar on your WordPress site is a great way to inform visitors about important dates such as product launches or upcoming promotions.
But embedding a Facebook events calendar on your website involves several steps that can be confusing for beginners.
So in this article, we show you how to display a Facebook events calendar in WordPress, step-by-step, using these methods:
- Display Events With the Facebook Page Plugin Widget
- Display Facebook Events with a WordPress Plugin
To start, let's talk about why it's important to embed a Facebook events calendar on your website.
Or, you can click here to skip ahead to the easiest way to add a Facebook events page to your site.
Why Embed Facebook Events on Your Website?
There are several reasons why your business needs to display Facebook events on your website.
The most obvious is to tell site visitors about upcoming events so they can join in.
More importantly, if your visitors aren't already aware of your Facebook page, showing your page's events encourages them to like your page for more updates.
Here are a few more reasons for embedding Facebook events in your WordPress website:
- You can promote your events to your visitors, even if they don't use the Facebook app, so you can boost attendance.
- A Facebook events calendar encourages visitors to engage with and explore your Facebook page leading to more followers.
- You can boost Facebook page engagement and help your content appear higher up in the news feed, raising awareness and increasing traffic to your page.
- Displaying Facebook events on WordPress keeps people on your site for longer. The longer people stay on your website, the better your site's rankings can be. It also increases the chances of your visitors converting into paying customers.
Now that you know the benefits of embedding a Facebook events calendar in WordPress, let's look at how to do it.
To use the solutions below, you should first make sure your business has a Facebook page set up. You also need to set up a Facebook page events tab.
When you've done that, come back to this guide to move on with adding Facebook events to your website.
Display Events With the Facebook Page Plugin Widget
The 1st method for displaying Facebook events on your website is to use the Facebook page plugin widget. This is Facebook's official developer tool for embedding aspects of your Facebook page on your website.
This method involves copying and pasting code snippets to WordPress. So if you're not comfortable with doing this on your site, try the other techniques in this article that don't require that.
Want to continue doing this manually? Let's get started with the first step below.
Step 1: Use the Facebook Page Plugin Code Generator Tool
The first step in adding a Facebook event calendar widget to your website is to visit the page plugin code generator tool here.
Next, enter your Facebook page URL and in the Tabs field, delete "timeline" and enter "events" as you can see below:

A preview of your page's events appears in the box below to give you an idea of how it will look live on your website.
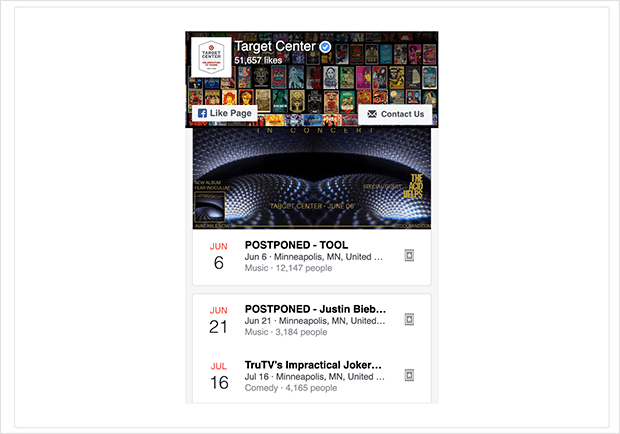
Step 2: Generate the Facebook Event Code
Once you've entered your page details, click the Get Code button. After choosing your app ID, you can then see the embed code needed to display your events in WordPress.
Along the top of the code box, you have the option of choosing JavaScript or iFrame.
The JavaScript code requires you to edit your site's theme files, while the iFrame code lets you embed the code in your posts, pages, or widget-ready areas.
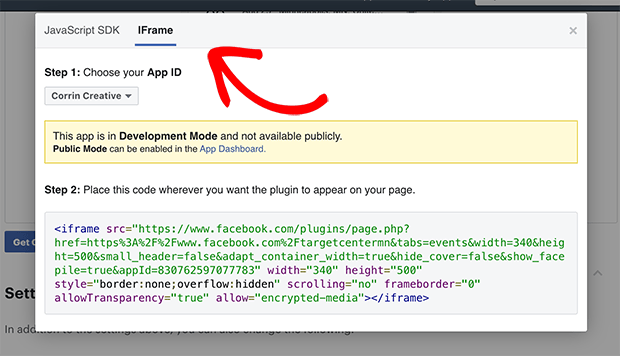
For this example, select the iFrame option and copy all of the code in the box. You might want to paste the code into a blank text file or notepad on your computer so you don't lose it.
Step 3: Paste the Facebook Event Code on Your Website
The next step is to embed the Facebook event code on your website.
In WordPress, head to your admin area and decide where you'd like to display your Facebook events calendar.
For this tutorial, we'll add our calendar to a widget in our site's sidebar. To start, head to Appearance » Widgets for an overview of your widgets and sidebars.
Then drag the Custom HTML widget to your chosen sidebar. Give the widget a title to inform visitors what it's for and paste the code you copied earlier into the box.
Then click Save and Done to save your changes.
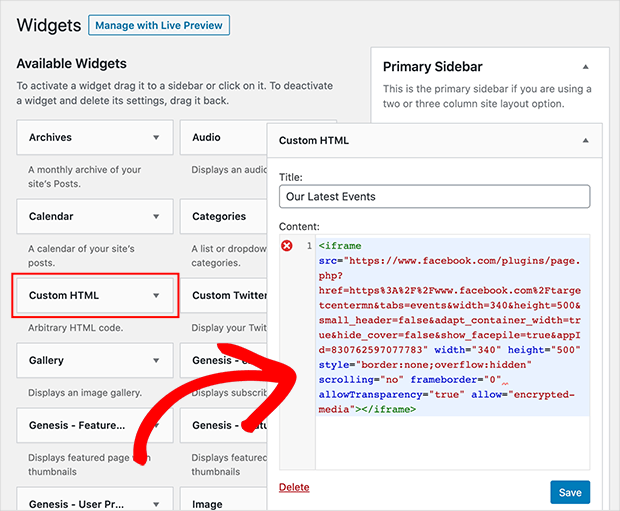
You'll see your Facebook events displayed in your sidebar when you navigate to your main website.
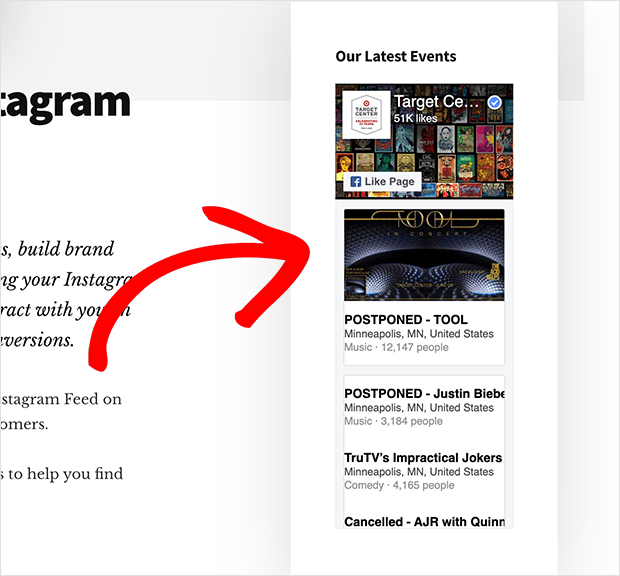
In our example, we changed the iFrame code's width, so the widget fits our sidebar better.
But what if you're not comfortable with editing code, and you'd like a more straightforward and customizable option?
The next method is so easy to get up and running — even complete beginners can embed their Facebook events calendar on their website with a couple of clicks.
Display Facebook Events with a WordPress Plugin
For the next method, we're using a WordPress plugin to display Facebook events on a website.
WordPress plugins extend the functionality of WordPress without the difficulty of manually coding your website.
Just upload the plugin file, activate it, and click a few settings to get going. No need to hire a Facebook developer or deal with coding languages or CSS!
For this example, we'll use the Custom Facebook Feed Pro plugin from Smash Balloon.
It's the best Facebook feed plugin for WordPress. Using it can help you seamlessly integrate your Facebook content with WordPress in a few clicks.
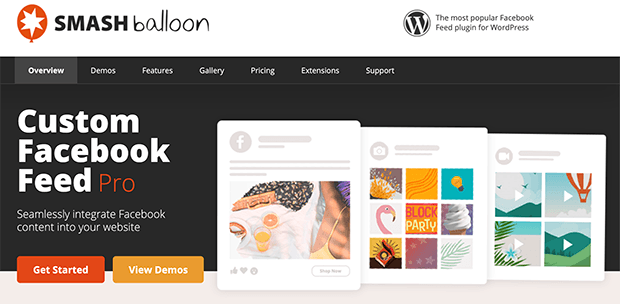
Besides displaying Facebook events on your site, this Facebook feeds plugin has the following features:
- Display multiple Facebook feed types on your site, including posts, photos, video feeds, and more.
- Control the information displayed in your feeds, such as headers, dates, descriptions, and more.
- Easily manage and display multiple Facebook account feeds on a single website.
- Completely customize your feeds' look and feel with layout choices like Facebook slider and styling options to match your website branding.
- Display your feeds beautifully on mobile devices with the mobile-friendly design
- Show Facebook reviews on your website to establish social proof andincrease salesfor your business.
- And much more!
Even better, you can do all that without having to write a single line of code, making it super-easy for beginners to get started with.
What's more, the Custom Facebook Feed Pro plugin will automatically connect to the Facebook API for you so you can start displaying your Facebook events on your site. Yes, even if you're a WordPress newbie!
Just install the plugin and let it do all the hard work for you.
Step 1: Download and Install Custom Facebook Feeds
Get your copy of Custom Facebook Feed Pro and then install and activate the plugin to get started.
If you need help with that, just look at our step-by-step guide on how to install a WordPress plugin.
Step 2: Create Your Facebook Events Calendar
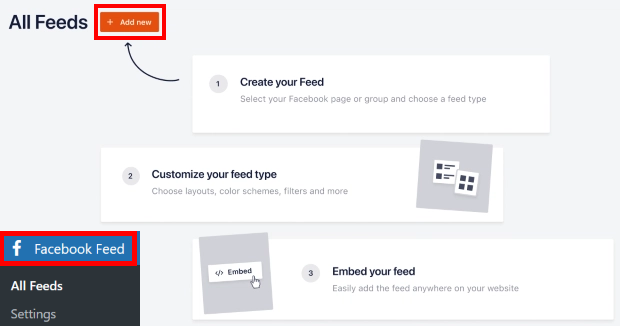
Once you've installed and activated the plugin on your site, go to the Facebook Feed » All Feeds menu from your dashboard.
To start creating your Facebook events calendar, click on Add New.
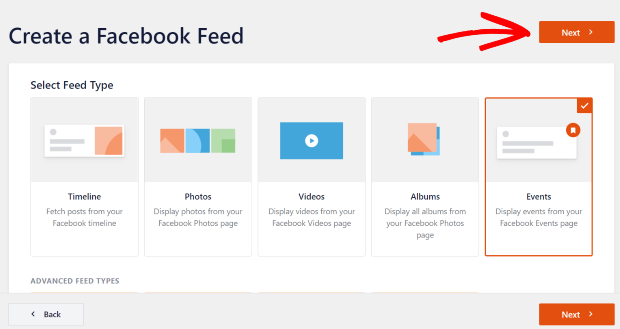
After that, you can see that 9 different types of feeds are available here, including a timeline feed, photos feed, videos feed, events feed, reviews feed, and much more.
Just select Events from a list of options and then click on Next.
Step 3: Connect to Your Facebook Page or Group
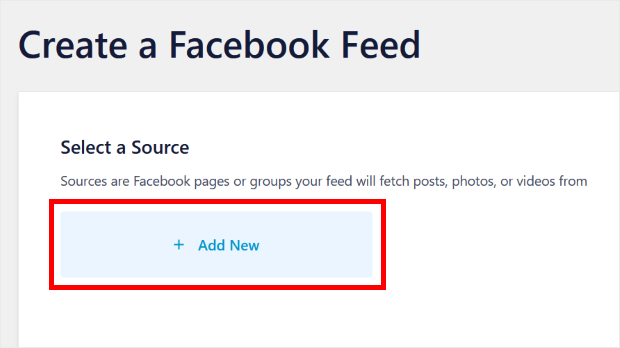
Once you've created your feed, you can choose the source for your events. That can be a Facebook page or a group where you've planned your events.
To do that, click on the Add New button.
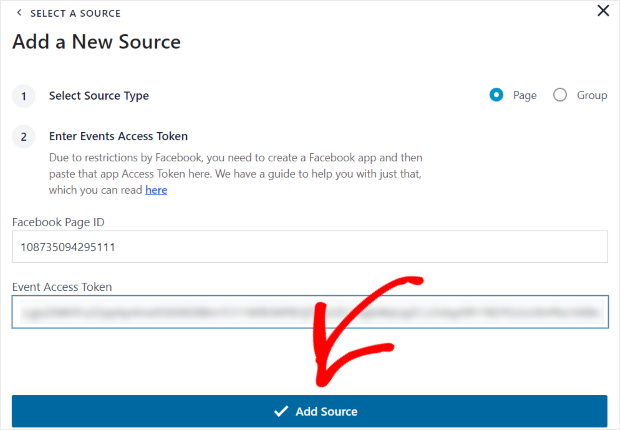
You can now see a new pop up where you'll have to add your Page ID and Event Access Token.
To get the ID and token for your page, just follow the instructions here.
Once you've done that, just fill them in and click on Add Source.
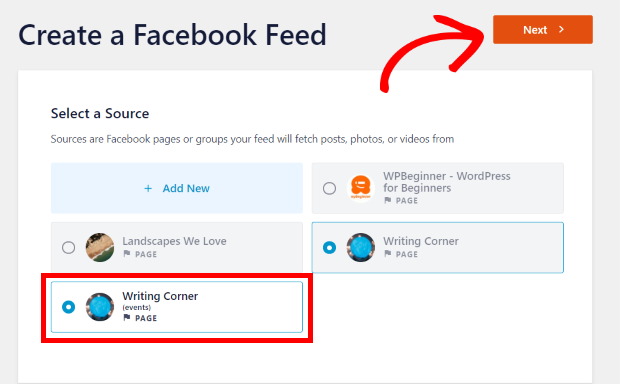
Finally, you can just select the newly added source and click on Next.
Step 4: Customize Your Facebook Events Calendar
With that, you can move on and customize your events calendar. You can now see a live preview of your feed on the right, and the customization options are on the left.
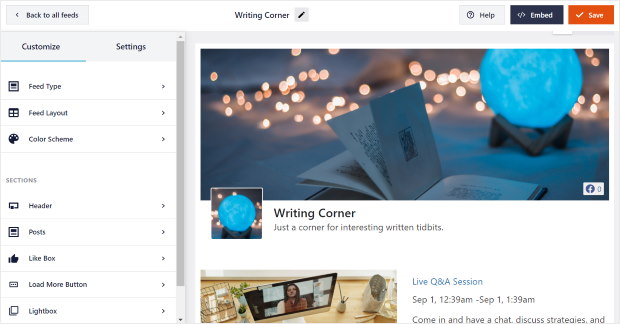
With these options, you can customize the feed type, layout, color, header design, post design, and a lot more.
First, select the Feed Layout option on the left.
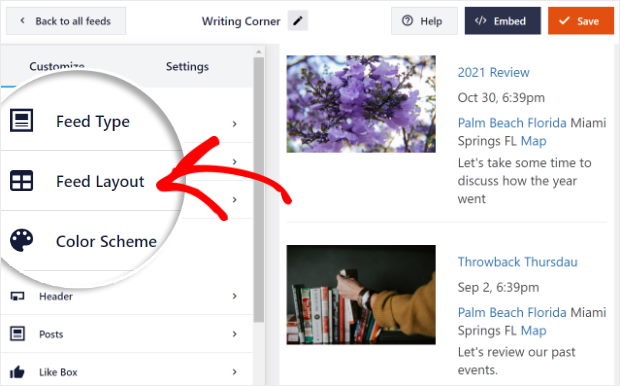
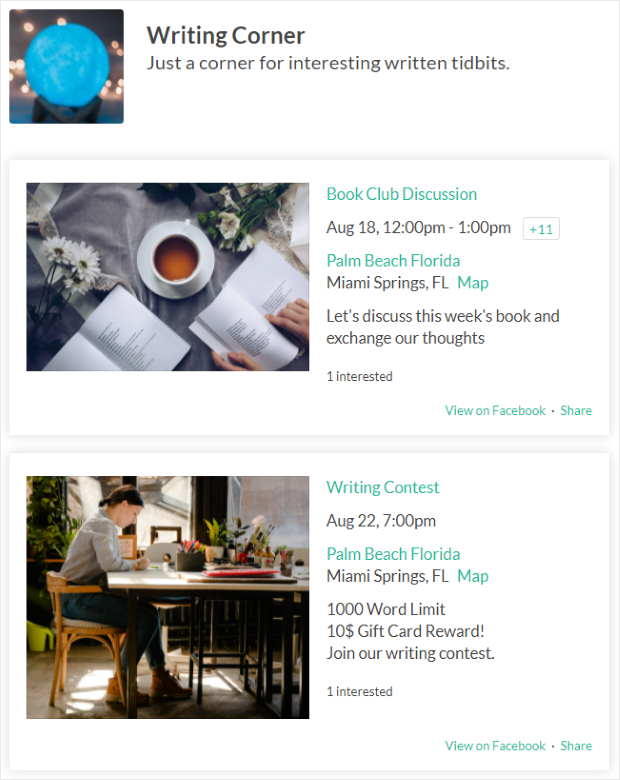
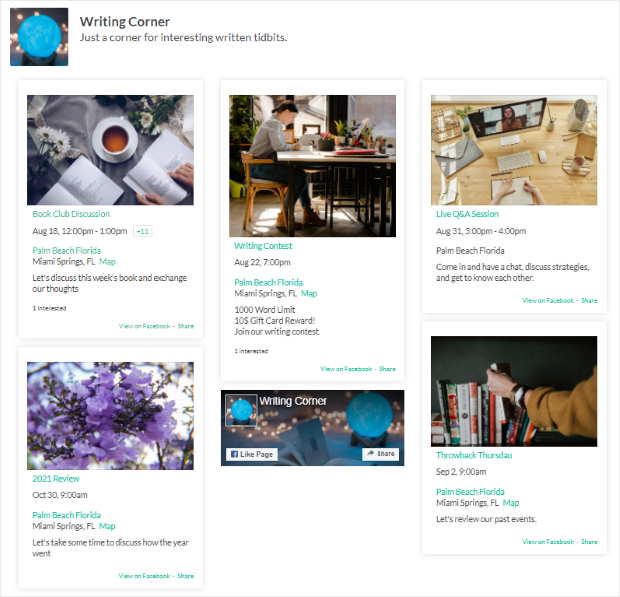
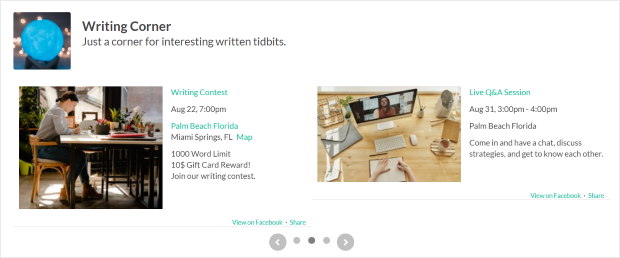
For your events calendar, you have 3 different layouts: List, Masonry, and Carousel.
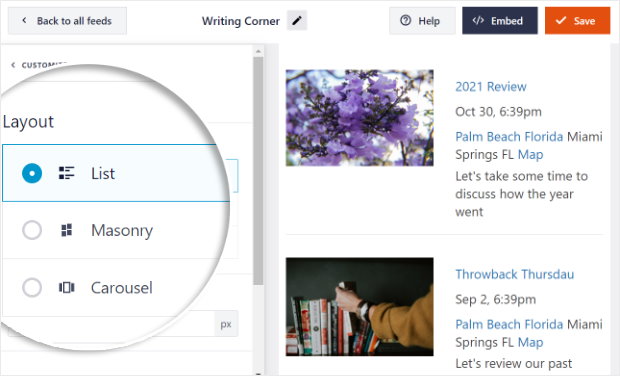
If you want your events to be listed one after another, you can go for the list layout.
To show your Facebook events in columns instead, you can try the masonry layout instead.
And there's also a carousel layout where you can show events in a beautiful carousel slider.
After you've picked the feed layout, click on theCustomizeoption at the top to go back to the previous customization options.
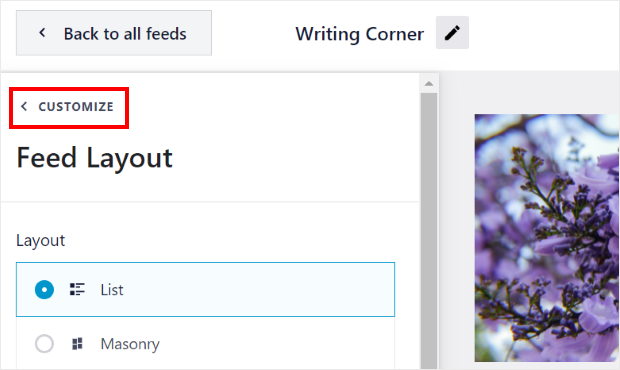
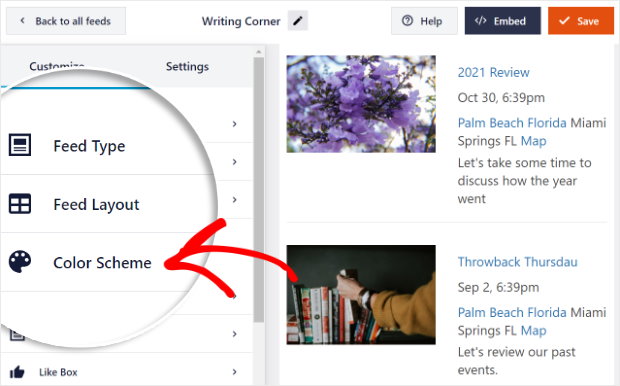
You can then pick the color scheme for your Facebook feed. To do that, select theColor Schemeoption on the left.
Now, you can pick between 4 different options for your feed color.
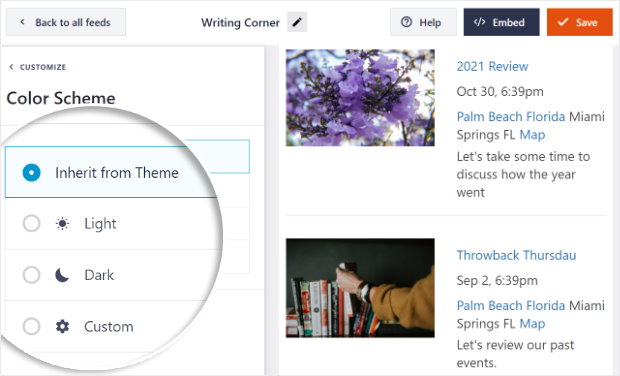
- Inherit from Theme: Copy the color scheme of your website
- Light: Have a light background with dark-colored text
- Dark: Turn the background dark with light-colored text
- Custom: Enter all the colors yourself
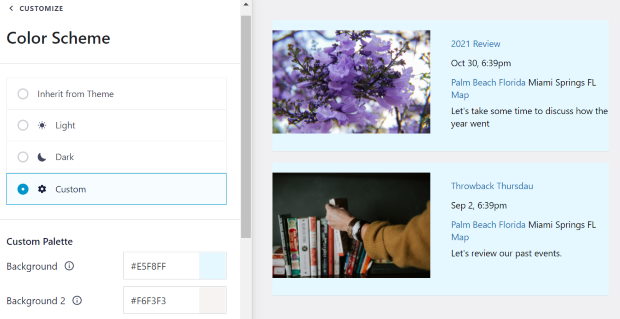
Then you can customize other parts of your events calendar, like the header design, feed size, margins, and a lot more.
Once you're happy with the design of your Facebook events calendar, click on the Save button.
Step 5: Display Your Facebook Events Calendar
After you're done customizing, you can now display your Facebook events calendar on your website. Now, you can do it in 2 different ways just by clicking — no need to deal with any shortcode.
Display Facebook Events Calendar on Your Pages
To post your Facebook events calendar on your WordPress page, click on the Embed button on your live editor.
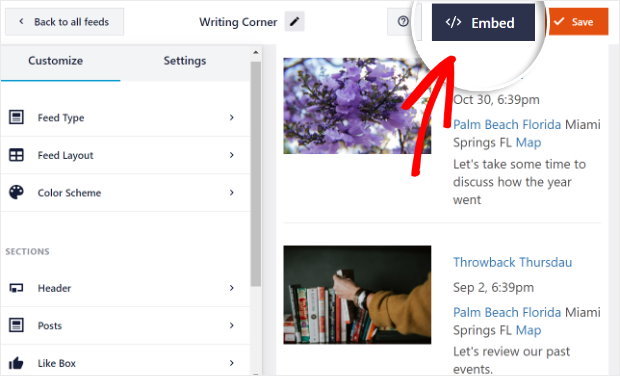
You can see a new popup to let you choose where to post your Facebook events calendar.
There, just click on the Add to a Page button to proceed.
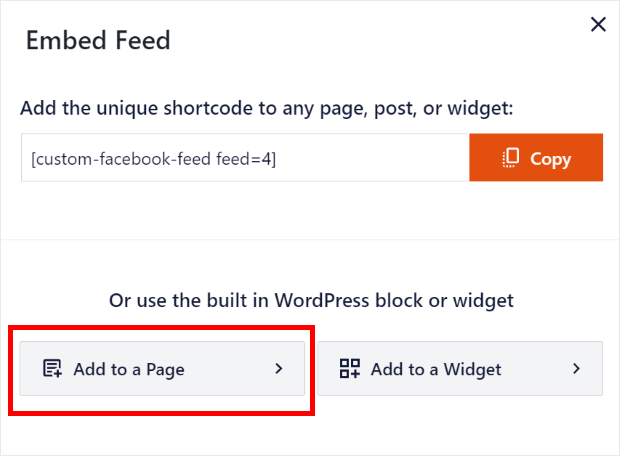
After you do that, you can now pick from your list of pages. Just select the one where you want to post your Facebook events calendar and click on Add.
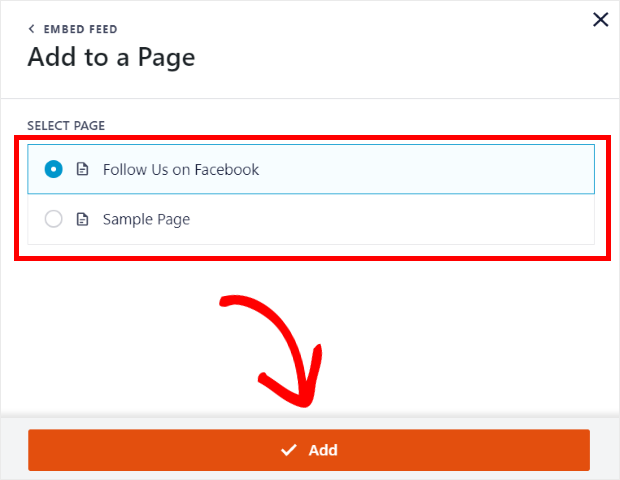
Now, the plugin will send you to the page you've just chosen.
On this page, click on the small plus icon (+) and select the Custom Facebook Feed widget to add your Facebook events calendar.
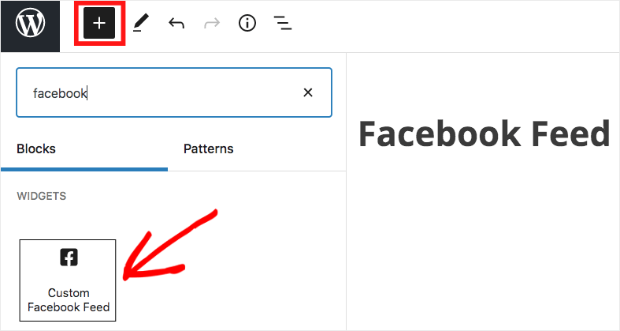
And you've just added your Facebook events calendar to your website! You can just check your website and see how it all looks.
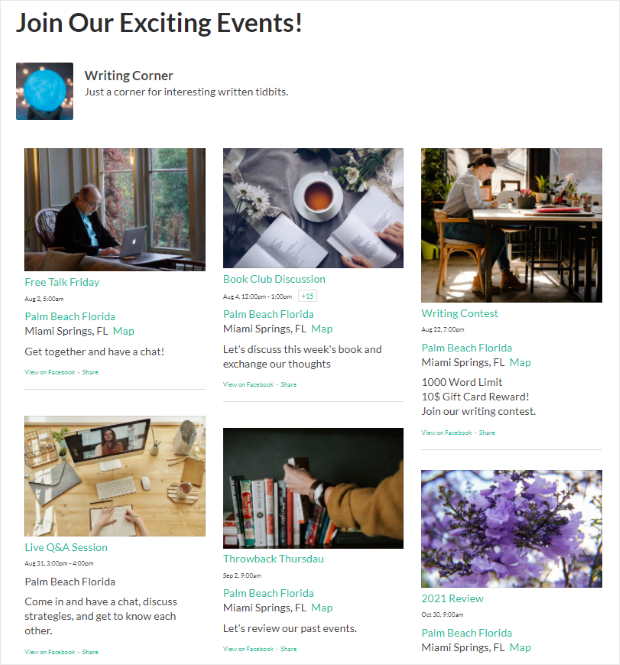
Display Facebook Events Calendar on Your Sidebar
The second way is to show your Facebook events calendar on the sidebar of your website. And it's pretty easy too.
To get started, you'll first have to open your feed in the live editor.
Go to the Facebook Feed menu from your WordPress dashboard, and you can see all of your Facebook feeds listed.
From that list, click on your Facebook events feed.
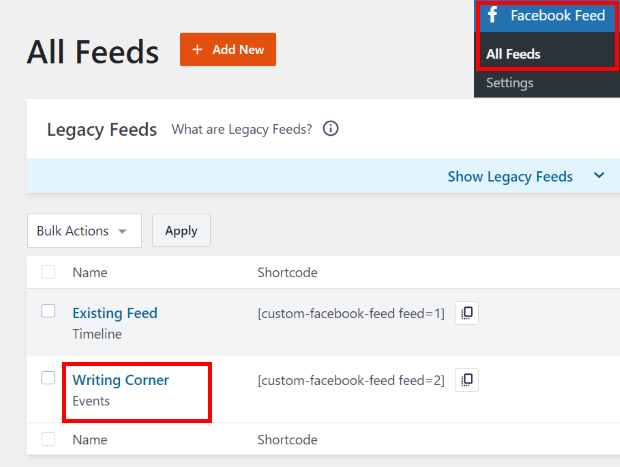
Now you'll be back in the live editor. Here, just click on the Embed button at the top.

Now, the plugin will show you a popup where you can choose the location of your Facebook events calendar. You can just click on the Add to a Widget button to continue.
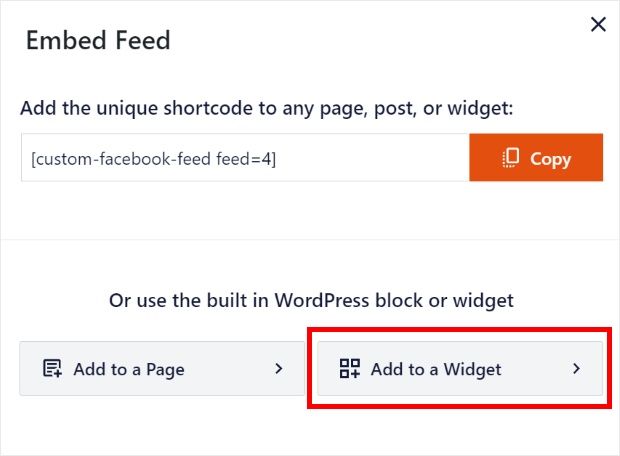
After you do that, the plugin will automatically send you to the widgets page.
From the list of all the options, just click on Sidebar.
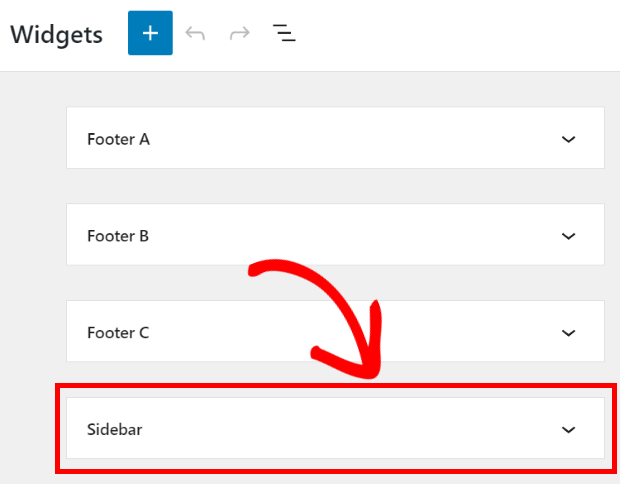
In fact, you can also show your Facebook events calendar on your footer if you like. To do that, you can click on the Footer option instead.
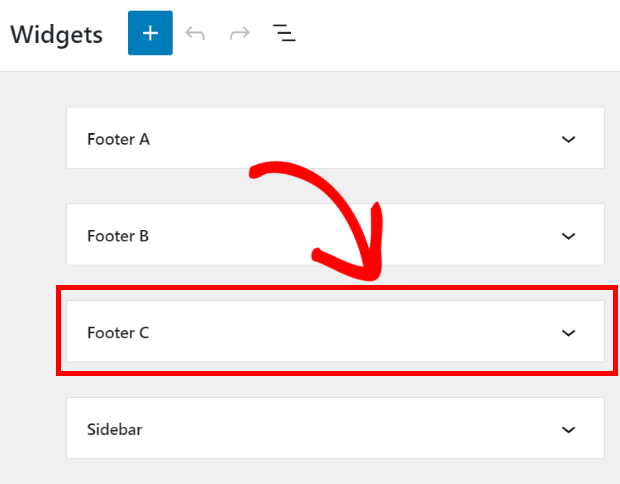
For now, we'll post the Facebook events feed on the sidebar.
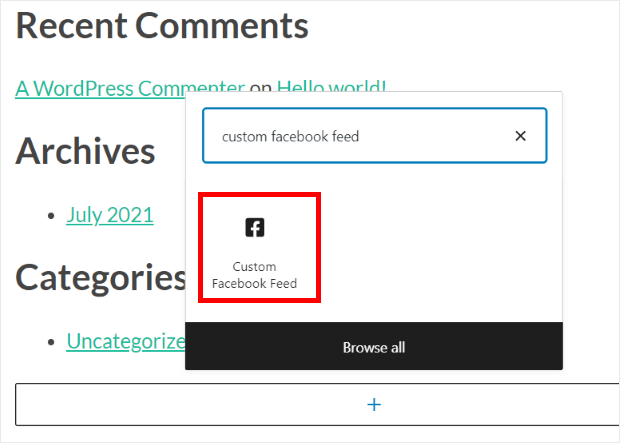
Once you click either the sidebar or the footer, you can see all the active widgets in a drop-down menu.
There, you can click on the plus icon (+) to add a new widget.
You can pick the Custom Facebook Feed widget from the options to display your Facebook calendar widget on your website sidebar.
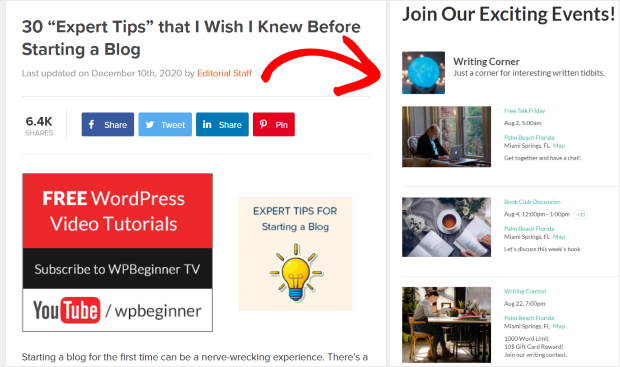
And you're done! Just go and check your website and see how your Facebook events calendar looks.
For help with more Facebook events feed settings, see the documentation here.
And that's it!
We hope this article helped you learn how to display a Facebook events calendar on your website.
What are you waiting for?
Get started with Custom Facebook Feed Pro now!
Or, if you want unlimited accessto Smash Balloon plugins so you can use them onunlimited websites, go ahead and get the All Access bundle here.
As the best social media aggregator, Social Wall Pro lets you combine your social media feeds from Facebook, Twitter, Instagram, and YouTube into a single feed.
The great part about Smash Balloon's pricing method? It comes with a 100% no-risk money-back guarantee, so you can try out the plugins first and see if it's a good fit for you.
Plus, Smash Balloon plugins are trusted by some of the world's greatest brands:

Interested in more tips on Facebook marketing? You may want to check out our next article on how to get more likes on your Facebook page.
To make things even easier, you can also check out our list of the best Facebook marketing tool.
And do follow us on Twitter and Facebook for more helpful content about social media marketing.
Display Facebook Events On Website
Source: https://smashballoon.com/how-to-display-facebook-events-on-your-website/
Posted by: moorenetaid.blogspot.com

0 Response to "Display Facebook Events On Website"
Post a Comment